The size you choose for your tarp depends on whether you are ordering a custom vinyl tarp or a pre-made poly tarp.
When ordering a custom tarp, size it to exactly the size you need. In most cases your tarp will be very close to the size you ordered but keep in mind that these are made by hand so they could be off by an inch or so. If an exact size is critical to your application, please make a note about this when you order it so that we are extra careful about sizing it perfectly. Continue reading below for more on custom tarp sizing.
Pre-made poly tarps are always sized using what is known a "cut sizes". What this means is that the finished tarp is generally 4 or 5% smaller than the size you order. Therefore, when ordering a stock poly tarp, be sure to order it slightly larger than what you need.
The size you require generally depends on what you need to cover and how you want to fasten it. Let's go through some examples.
The first thing that you will need to decide when ordering a utility trailer tarp is the type of configuration you would like. Let's look at some common configurations.
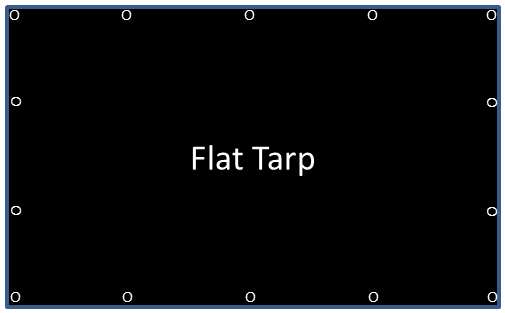 Most people choose a flat configuration since this is generally the least expensive option and it also makes the cover somewhat more versatile since it can be used for other purposes besides covering one specific trailer. The only downside to using a flat tarp for a utility trailer is that you will have excess material in the corners that will need to be folded over when securing the tarp.
One of the advantages of ordering a flat tarp is that you may be able to loosen the tarp on one end when your trailer is not in use in order to allow one end to sag to facilitate rainwater run-off.
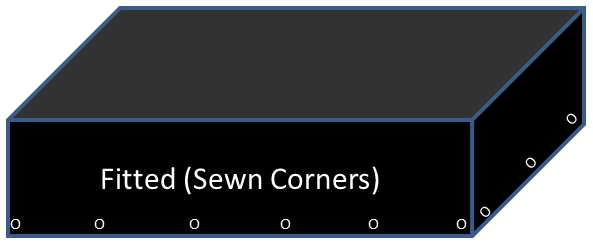 Fitted tarps are made in the shape of a box top wherein we cut out the excess corner material and sew the corners together. Sizing Fitted Tarps needs to be done very carefully since if you order a tarp that is slightly too small it may not fit on your trailer. On the other hand, if you make the tarp too big it will look sloppy and it may not fasten securely.
Be sure to read our page concerning water run off to consider how you plan to prevent rain water from pooling in the centre of your fitted tarp.
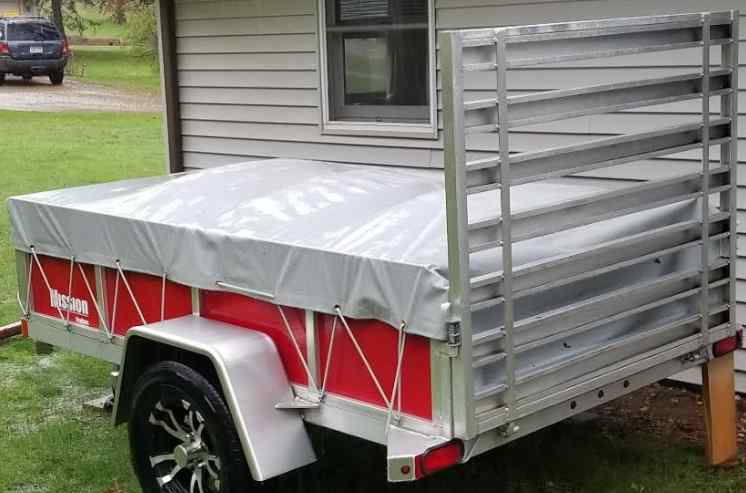 Some trailers have a tall gate or ramp that extends well above the rest of the trailer. This gate makes it difficult to use a traditional flat or fitted tarp. Instead, the best option is usually to order a tarp with a flap like the one depicted below.
 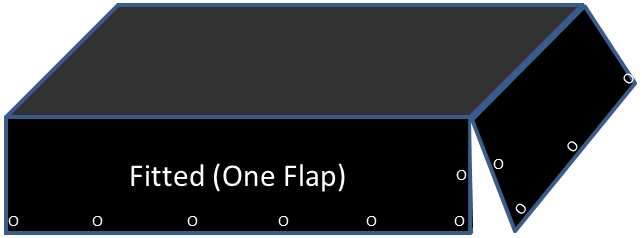 The flap would then be tucked into the inside of the trailer to secure the contents without being obstructed by the gate or ramp.
Notice the trailer shown here has angle iron protruding out to reinforce the sides. Be sure to adjust your width to include features such as this.
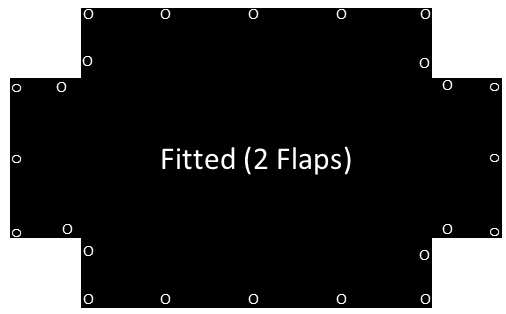 In some cases you will want flaps on both ends of your fitted tarp. This could be used to accommodate a ramp on each end of your trailer or to allow you to access a gate without removing the tarp entirely.
This also eliminates the issue of having to fold over excess material when using a standard flat tarp.
Now that you have decided what configuration you would like, refer to the section below to learn how best to size your tarp.
When ordering a fitted tarp, you must use the complex custom tarp order form. The width and length that you enter reflects the size of the top of the tarp (not the top of the trailer). In addition, you must specify a height which specifies the length of the sides.
For fitted covers we generally recommend running a tape measure across the top of the trailer in each direction to get the distance from the outside of one edge to the outside of the opposite side and then add one inch to give you a little bit of play so that it is not too difficult to get it on and off. For large tarps you might consider adding 1.5 or two inches to the top dimensions. Vinyl tarps will shrink a little bit over time, however, usually not more than about one inch per ten running feet of material.
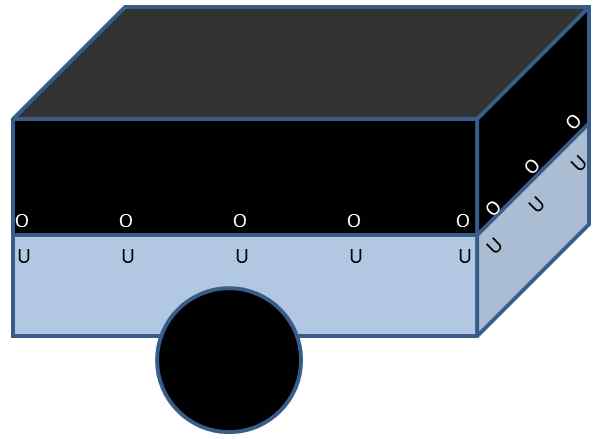
The height of your fitted tarp (the length of the sides) will depend on where you plan to fasten the tarp and also whether there are any obstructions on the side of your trailer such as protruding fenders. In some cases you will want to have us cut out sections of the sides so that you can go around these obstructions. If the sides are made too long they could end up being below your fasteners and so you won't be able to use those fasteners to secure your tarp.
You will normally want to measure the distance from the top of the side of your trailer to the location of your fastener. Then subtract at least two inches from this distance to determine the length of the sides. While two inches is a minimum distance, making the distance between the bottom of your tarp and your fasteners longer is usually preferred since it allows you to put more tension on the ropes used to tighten the tarp down. For this reason, you usually want to place your fasteners near the lower half of your trailer.
Notice in our diagram we have the same number of grommets as fasteners. Consider where your fasteners are located when ordering your tarp since there is really no point in adding grommets that have no place to be fastened. In our example, we lined up the fasteners with the grommets. Another strategy is to offset the fasteners so that the fasteners straddle each pair of grommets as shown here.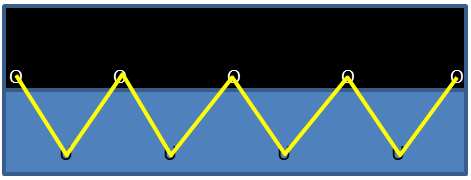
If you require very specific grommet spacing, it is always best to send us a diagram showing where you would like us to put each grommet.
When ordering flat tarps, you just need to tell us the length and width of the finished tarp you require. To calculate these values you normally start by deciding how far down the sides that you want the tarp to go. Just as with fitted tarps you want to make sure the edge of the tarp stays at least a couple of inches above your fasteners. Then to calculate the overall tarp width you would use the following calculation:
tarp-width = trailer-width + (2 x tarp-side-height)
The length would be calculated in a similar way; however, you don't necessarily need to come down the same distance on the ends as you do on the sides.
When sizing your trailer tarp, also consider what you plan to haul with your trailer. If your payload is often higher than the trailer itself, you will want to increase the size of your tarp to accommodate taller loads. If you do make the tarp bigger for this reason, make sure your fasteners will still be usable when the trailer has a small load or is empty.
Before ordering your tarp, it is a good idea to pull out a tape measure to the width you are planning to order and to run this across your trailer to make sure it will work for you. The same goes for the length.
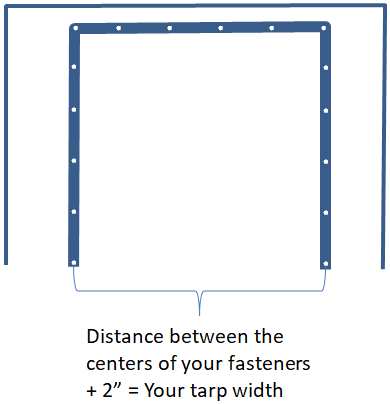
If you are planning to cover an opening such as a garage or barn door the first thing you should determine is where you plan to place your fasteners since this will determine where the grommets on your tarp need to end up. Our grommets are generally centred one inch from the edge of the tarp so to get the tarp width you would measure the distance from the left edge of your left fastener to the left edge of your opposing right fastener (this equals the centre to centre distance) and then add two inches to calculate the tarp width. Please keep in mind that some materials do shrink a little bit over time, so it is best to make your tarp an inch or two larger than the minimum size you need it to be to allow for shrinkage.
The height calculation would be similar except if your tarp is not fastened at the bottom you would just add one inch to the height of the horizontal fasteners. If you are planning to put a pocket (channel) on the bottom of your tarp where you can slide in a pipe or a chain, be sure to check out this chart to help you determine the size of the pocket you will need.
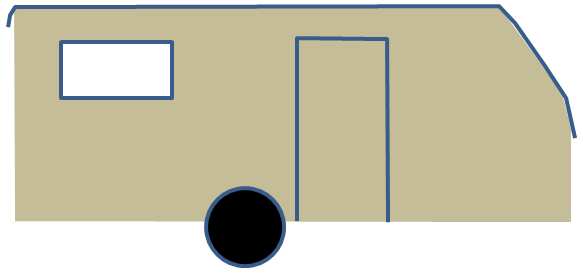 Travel trailers and RVs are notorious for having small leaks so we recommend keeping a waterproof cover on them all year round. At the same time, trailer manufacturers recommend a "breathable" material so that condensation does not form under the cover and cause mould and mildew. The problem is that breathable covers are not actually waterproof so they don't solve the leak problem. What we recommend is to cover the entire top of your travel trailer but keep most of the sides open so that you don't block off airflow under the cover. We have never had issues with condensation or mould using this technique but if you are concerned about it you could lay a few pool noodles under your cover to improve the air flow.
The main objective when you size the cover is to make it just large enough so that rainwater sheds to the ground, not onto the trailer. Most trailers have a tapered front section to improve wind resistance, you will want to make sure this section is covered by your tarp.
Generally, the width of the tarp just needs to be about a foot wider than your trailer, this will enable water to shed beyond the trailer walls while still allowing good air flow. Make sure you include any awnings or other accessories in your wide calculation.
If you have any questions about how to size the tarp for your application we recommend sending us a picture of what you are trying to cover and then we can give you recommendations for your specific project. You should also check out this page which talks about RV leak protection.
You might also be interested is this video that shows a technique for keeping rain water from hitting the sides of your RV.
Learn more about Fitted Tarps.